
CD Installation Process
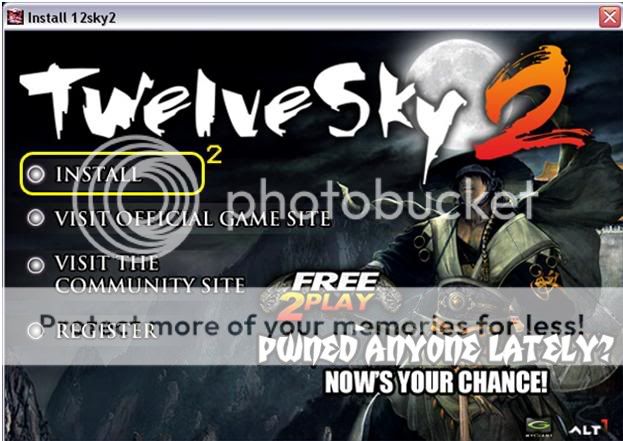
Step 1: Insert the TwelveSky 2 labeled “Disc 1”.
Step 2: Click “Install”.
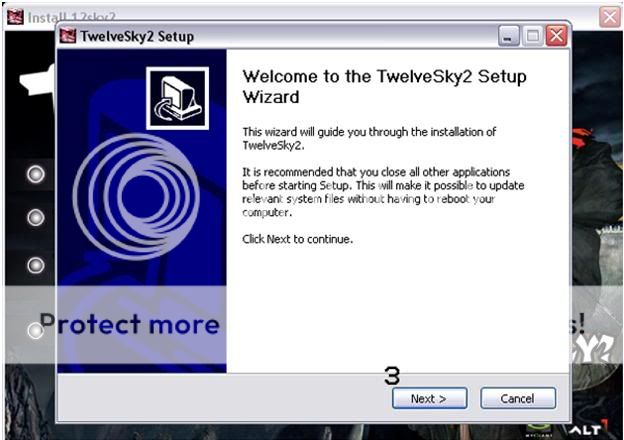
Step 3: Click on “Next”.
Step 4: Review the “License Agreement” then click on “I Agree”.

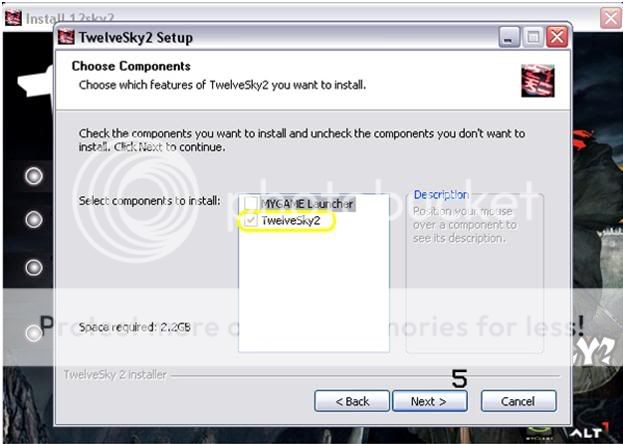
Step 5: Check both box that shows “mygame launcher” and “TwelveSky2”. Then click “Next”.*If you have other MyGames Installed on the computer, just put a check on “TwelveSky2” then click “Next”.
Step 6: Choose a destination folder and then click “Install”.

Step 7: Once partial of the Cd content have been installed, the system will then request for the 2nd disc. Insert the “TwelveSky 2 Disc 2” and wait for the installation to be completed.

Step 8: Once the installation is done, click “Finish”.

You will see an icon on the desktop that should look like this:

By: GM Ayumi